Why Your Garage Door Isn’t Closing (And How to Stop Pulling Your Hair Out)
We’ve all been there. You hit the button, the opener groans, the door starts its descent… and then pop, it reverses right back up. Maybe it gets halfway down and throws a tantrum. Maybe it just sits there blinking at you like a confused owl. Frustrating? Oh yeah. Especially when it’s raining, freezing, or you’re late for work. Take a deep breath, friend. Before you consider taking a sledgehammer to the thing (we don’t recommend it, tempting as it may be!), let’s walk through why this might be happening and how you can often troubleshoot it yourself. At Clearview Garage Doors in Denver, we see this exact panic daily, and trust us, most of the time, it’s something manageable.
Understanding the Usual Suspects (It’s Rarely Just Being Stubborn)
Garage doors are surprisingly complex beasts. They have safety features, moving parts, and electronics all working together. When one little thing goes out of whack, the whole system can shut down – literally. The most common culprits for a door refusing to close are usually related to safety sensors, physical obstructions, travel limits, or worn-out components. Let’s break them down.
H2: The Safety Sensors: Your Door’s Overprotective Bodyguards
This is hands down the #1 reason doors refuse to close. Those little eyes near the floor on either side of your door? Those are infrared safety sensors. They shoot an invisible beam across the doorway. If anything breaks that beam while the door is closing – a stray leaf, a kid’s toy, a misplaced shovel, or even a spider web – the opener immediately reverses the door. It’s a fantastic safety feature… until it gets finicky.
- H3: Sensor Troubleshooting 101:
- Check for Obstructions: Get down on your knees. Seriously. Look directly at the path between the sensors. Is there anything blocking the beam? Clear it away. Even dirt or grime on the lenses can sometimes cause issues.
- Check the Lights: Each sensor usually has a small LED light. One typically has a steady green light (the sending eye), and the other has a steady amber or red light (the receiving eye). If the receiving eye’s light is off or blinking, the beam is broken or misaligned.
- Realign the Sensors: Gently nudge the sensor brackets. Sometimes a bump can knock them out of alignment. The lights should both be steady. If they aren’t, carefully loosen the bracket screws (don’t remove them!), adjust the sensor until both lights glow steady, and retighten. Use a level for precision if needed.
- Clean the Lenses: Wipe the sensor lenses gently with a soft, clean cloth. Fingerprints, dust, or condensation can interfere.
- Check the Wiring: Trace the wires from each sensor back to the opener motor unit. Are they securely plugged in? Are there any visible cuts, crimps, or chew marks (pesky critters!)? FYI, damaged wiring is a common fix we handle during garage door repair calls here in Denver.
H2: Physical Blockades: When Stuff Gets in the Way
Even if the sensors are clear, something physically blocking the door’s path will stop it cold or trigger a reversal.
- H3: The Obvious (and Not-So-Obvious) Culprits:
- Track Check: Look down the entire length of the tracks on both sides. Is there a rock, a chunk of ice, a stray screw, or even built-up grime and rust causing a bump? Clear it out.
- Roller Inspection: Check the rollers (the wheels in the track). Are any bent, cracked, or completely seized up? A frozen roller acts like a brick wall. A little lubricant (more on that later!) might help temporarily, but damaged rollers need replacement.
- Door Binding: Manually try to move the door slightly down the track (disengage the opener first by pulling the red emergency release cord!). Does it feel smooth, or does it bind or catch at a certain point? Binding indicates a track alignment issue or a problem with a roller or hinge.
- Weather Stripping/Gasket Woes: Old, cracked, or misaligned weather stripping along the bottom of the door or the sides can sometimes catch and bind, especially if it’s swollen or warped. Similarly, a damaged garage door gasket at the bottom seal can cause issues. If replacing weather stripping seems daunting, give Clearview Garage Doors a shout.
H2: Travel Limits & Force Settings: The Opener’s Brain is Confused
Your opener has little dials or settings that tell it how far the door should travel (up and down limits) and how much force it should use to move it. If these get messed up, the opener might think the door has hit an obstacle when it hasn’t, causing it to reverse.
- H3: Adjusting with Caution:
- Force Adjustment: Look for a dial or knob on your opener motor unit labeled “Force” or “Down Force.” If the door reverses when it hits the floor, try slightly increasing this setting (usually turning a screw clockwise). BUT BE CAREFUL! Too much force is dangerous – the door could crush something. Make tiny adjustments and test.
- Travel Limits (Down Limit): There’s usually a separate dial/screw for “Down Limit” or “Close Limit.” If the door stops before hitting the floor, try slightly increasing this setting. If it slams into the floor or tries to keep driving down, decrease it. Again, small adjustments! Consult your opener’s manual if possible. IMO, this is where professional calibration shines – get the price of a tune-up versus risking damage.
H2: When Things Get Serious: Springs, Cables, and Opener Gremlins
If the simple fixes don’t work, we’re moving into potentially more complex (and dangerous) territory.
-
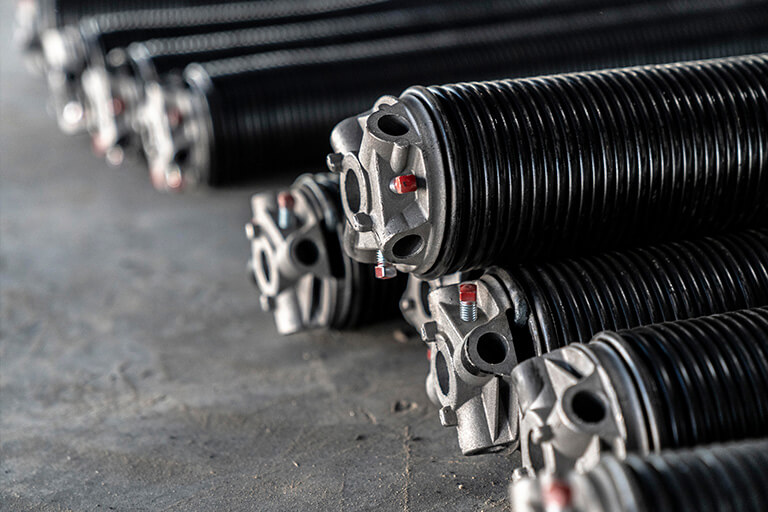
H3: The Dreaded Spring Situation:
- Broken Spring: This is a showstopper. If a torsion spring (mounted above the door) or extension spring (along the tracks) is broken, your door won’t move, or it will be incredibly heavy to lift manually. DO NOT ATTEMPT TO OPERATE THE DOOR OR REPLACE SPRINGS YOURSELF. Garage door springs are under extreme tension and can cause severe injury or death if handled incorrectly. This is 100% a job for professionals offering garage door spring repair or garage door spring replacement. Seriously, call Clearview Garage Doors or another qualified garage door spring services provider immediately. We handle these safely every day in Denver.
- Worn Spring: A spring that’s lost its tension (but isn’t broken) might allow the door to close partway before the opener strains and reverses, thinking it’s hit an obstacle. Still a pro job.
-
H3: Cable Concerns:
- Frayed, loose, or off-the-drum lift cables are dangerous and can cause the door to bind or operate unevenly. Do not touch these. This requires professional garage door repair.
-
H3: Opener Issues:
- Gremlins: Sometimes the opener itself malfunctions. Try unplugging it for 30 seconds and plugging it back in (a hard reset). Check for any error codes flashing on the unit.
- Remote/Wall Button: Is the battery dead in your remote? Does the wall button work? Try reprogramming the remote if it’s unresponsive. If the wall button works but the remote doesn’t, it’s likely a remote issue. If neither works consistently, the opener might be failing.
- Logic Board Failure: The opener’s brain (logic board) can fail, causing erratic behavior. If basic resets and sensor checks don’t help, it might be time to consider opener repair or replacement. Commercial overhead door repair often deals with complex opener systems too.
H2: Maintenance: The Best Defense is a Good Offense (And Some Lubricant)
Many of these headaches can be avoided with regular garage door maintenance. It’s like an oil change for your car – preventative care saves big bucks (and frustration) later.
- H3: Your Quick & Dirty Maintenance Checklist:
- Lubricate: Every 6-12 months, lubricate moving parts:
- Roller stems (not the wheels themselves on nylon rollers)
- Hinges
- Springs (lightly with a specific garage door lubricant or silicone spray – avoid WD-40 for springs!)
- Lock mechanism (if you have one)
- The opener’s drive screw or chain (check manual).
- Tighten: Check and tighten any loose bolts or screws on brackets, tracks, and hardware. Avoid touching spring adjustment components!
- Inspect: Visually inspect:
- Springs for gaps or damage (look, don’t touch!)
- Cables for fraying
- Rollers for wear or cracking
- Tracks for dents or misalignment
- Weather stripping and bottom seal for damage
- Clean: Wipe down tracks to remove grime and debris. Clean sensor lenses.
- Test Safety Features: Monthly, test the auto-reverse safety feature. Place a block of wood (like a 2×4) on the floor where the door closes. Close the door. It should reverse immediately upon hitting the wood. If not, call a pro immediately – this is a critical safety function. Also test the sensors by waving something under them while closing.
- Lubricate: Every 6-12 months, lubricate moving parts:
When to Throw in the Towel (And Call Us!)
Be honest with yourself about your comfort level and the potential danger. Here’s when picking up the phone is the smartest move:
- Anything involving springs or cables: Just don’t. The cost of an ER visit is way higher than our service call.
- Track realignment: This requires precision tools and know-how.
- Opener motor or logic board failure: Diagnosis and repair/replacement are best left to experts.
- Persistent problems after basic troubleshooting: If you’ve checked sensors, obstructions, and done a reset, and it’s still misbehaving, there’s likely a deeper issue.
- Commercial Systems: Commercial garage door repair and commercial overhead door repair demand specialized knowledge and equipment. Don’t risk downtime – call professionals experienced with heavy-duty doors.
- Installing New Doors: Thinking about new garage doors, especially insulated garage doors? Garage door installation is complex and impacts your home’s security, energy efficiency, and curb appeal. Get it done right the first time. We offer expert garage door installation across Denver.
Why Choose Clearview Garage Doors? (Beyond Just Fixing the “Won’t Close” Drama)
Look, we get it. You need someone reliable, knowledgeable, and fair. When you search “garage door repair near me” in Denver, you want a local team that shows up on time, diagnoses accurately, and doesn’t try to sell you stuff you don’t need. That’s Clearview Garage Doors. We’re Denver neighbors helping neighbors. We pride ourselves on transparent pricing, honest assessments, and getting your door working safely and smoothly, whether it’s a quick sensor realignment, a critical garage door spring replacement, garage door gasket installation, or installing beautiful, efficient new garage doors. Don’t wrestle with that stubborn door all weekend. Give us a call or swing by – let the Denver garage door experts handle it. 🙂
Your Garage Door Won’t Close: Quick Reference Guide
| Symptom | Most Likely Culprit | DIY Fix? | Time to Call Clearview? |
|---|---|---|---|
| Door reverses immediately | 1. Obstructed Safety Beam | ✅ Clear path, clean lenses | ❌ Only if sensors faulty |
| 2. Misaligned Sensors | ✅ Try realigning (check LEDs) | ✅ If realignment fails | |
| Door reverses when hitting floor | Down Force Too Low | ✅ Slight increase (Careful!) | ✅ If adjustment doesn’t work |
| Door stops/stutters partway | 1. Physical Obstruction | ✅ Inspect tracks/rollers | ❌ Only if binding persists |
| 2. Binding Roller/Track | ⚠️ Lubricate (temp fix) | ✅ For realignment/repair | |
| 3. Worn Spring (Low Tension) | ❌ DANGER | ✅ Immediately | |
| Door is very heavy manually | Broken Spring | ❌ EXTREME DANGER | ✅ Immediately |
| Door doesn’t move/noise | 1. Disengaged Opener | ✅ Pull red cord back down | ❌ |
| 2. Broken Spring/Cable | ❌ DANGER | ✅ Immediately | |
| 3. Opener Failure | ✅ Try hard reset | ✅ If reset fails | |
| Lights blink/Error Codes | Opener Malfunction/Sensor | ✅ Check sensor lights/wiring | ✅ For diagnosis/repair |
FAQ: Your Garage Door Closing Conundrums Solved
-
“How much will it cost to fix my garage door that won’t close?”
Ah, the million-dollar question (hopefully not literally!). The cost varies wildly depending on the problem. A simple sensor realignment might be a minimal service call fee. Replacing a single broken spring typically ranges from $200-$400+, while replacing the entire opener could be $500-$1000+ installed. Clearview Garage Doors always provides a clear, upfront estimate before any work begins. We know transparency matters when you’re searching “garage door repair near me” and worrying about price. -
“Can I really replace a garage door spring myself?”
Let’s be brutally honest: NO. We cannot stress this enough. Garage door springs are under immense, deadly tension. DIY garage door spring replacement is one of the most dangerous home repairs attempted. Professionals have the specialized tools, training, and experience to handle them safely. The potential for severe injury or worse is simply not worth the risk. Please, call a qualified garage door spring services company like ours. -
“My door closed fine this morning but won’t close now! Is this an emergency?”
It depends! If the door is stuck open, compromising your home’s security or letting in freezing air/rain, yes, it’s an emergency, especially in Denver weather. If it’s stuck closed and you don’t need to get your car out immediately, it might wait. However, if a spring is broken or a cable is damaged, it’s a safety hazard regardless of position. If you suspect spring or cable issues, treat it as urgent. We offer emergency garage door repair services for exactly these situations. -
“How often should I really do garage door maintenance?”
We recommend a basic visual inspection and lubrication every 6 months (spring and fall are good reminders). Test the auto-reverse safety feature monthly. A professional tune-up every 1-2 years is ideal, especially for older doors or heavily used ones. Think of it like changing your oil – regular garage door maintenance prevents costly garage door repair down the line and keeps everything running safely and smoothly. It’s way cheaper than a spring replacement or a new opener!
There you have it! We’ve covered the why and the how-to (and the how-not-to) of a garage door that refuses to close. Remember, start simple (sensors and obstructions!), be safe (especially around springs!), and don’t hesitate to call the pros at Clearview Garage Doors when things get hairy or you just want it done right. Now go enjoy a garage door that actually listens to you! 🙂