Hey there, garage door warriors! Let’s talk about that moment when your trusty LiftMaster garage door opener decides to throw a tantrum. You know the drill: you press the button, it ignores you. You press it again, and suddenly it’s like you’re arguing with a moody teenager. But before you start googling “commercial garage door repair near me” in a panic, take a breath. We’ve got your back. At Clearview Garage Doors in Denver, we’ve seen it all—from stubborn remotes to springs that quit faster than a New Year’s resolution. Today, we’re breaking down how to reset your LiftMaster garage door opener like a pro.
Why Resetting Your Opener is Easier Than You Think
First off, let’s squash the myth: resetting a LiftMaster isn’t rocket science. Sure, it feels intimidating if you’ve never done it before (and hey, we’ve all been there). But 90% of the time, it’s just a matter of following a few simple steps. Think of it like rebooting your Wi-Fi router—annoying, but totally doable.
Pro Tip: If you’re also considering upgrading to insulated garage doors (Denver winters, amirite?), give us a shout. We’ll hook you up with a seamless garage door installation that pairs perfectly with your freshly reset opener.
Step-by-Step: Resetting Your LiftMaster Opener
Ready to play garage door whisperer? Grab your remote, locate the opener motor unit (it’s that box on your ceiling), and let’s dive in.
Step 1: Find the “Learn” Button
- Pop open the cover of your LiftMaster motor unit.
- Look for a brightly colored button (usually yellow, red, or purple). That’s your “Learn” button—the magic key to resetting everything.
- Fun Fact: This button’s color isn’t just for show. It’s like your opener’s way of saying, “Hey, over here! I’m important!”
Step 2: Press and Hold
- Press and hold the Learn button for 6–10 seconds. The LED light next to it will blink and then turn off.
- Congrats! You’ve just wiped the opener’s memory cleaner than a Marie Kondo binge session.
Step 3: Re-Pair Your Remote
- Now, press the Learn button once more (just a quick tap this time). The LED will glow steadily.
- Within 30 seconds, press the button on your remote. You’ll hear a click, and voilà—you’re back in business.
Got Multiple Remotes? Repeat Step 3 for each one. And if your keypad’s acting up, follow the same steps (you’ll need to enter your PIN afterward).
When Things Go Sideways: Common Reset Hiccups
Let’s be real: sometimes, even after resetting, your opener might still act like it’s starring in a horror movie. Here’s how to troubleshoot like a Denver pro:
| Issue | Quick Fix |
|---|---|
| Remote Not Working | Replace the batteries. Seriously, 50% of “broken” remotes just need fresh AAs. |
| Opener Won’t Reset | Check the circuit breaker. If it’s tripped, flip it back and try again. |
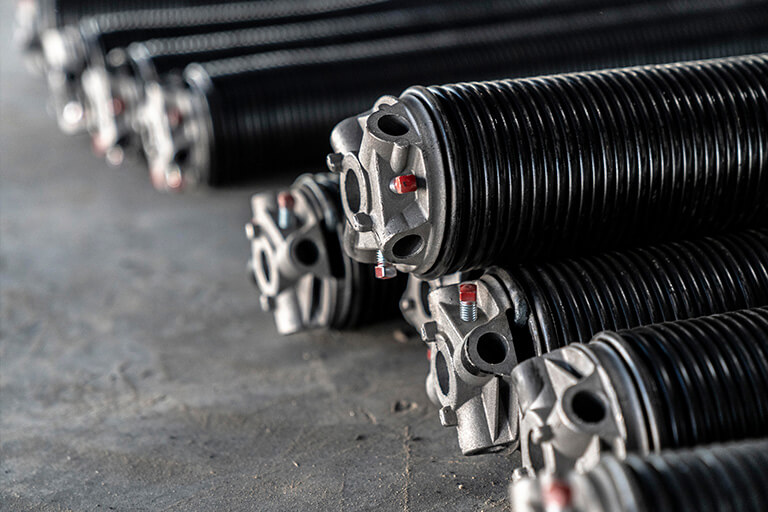
| Weird Noises | Could be a sign you need garage door spring repair—call us before it snaps. |
FYI: If your opener’s older than your smartphone, maybe it’s time for new garage doors. We’ll handle the heavy lifting (pun intended) so you can Netflix in peace.
“Should I Just Call a Pro?” (Spoiler: Sometimes, Yes)
Look, we get it. DIY is fun until you’re three hours deep, covered in grease, and questioning your life choices. Here’s when to throw in the towel and call Clearview Garage Doors:
- The opener still won’t reset after multiple attempts.
- You hear grinding or screeching (that’s the opener screaming for help).
- The door feels heavier than your emotional baggage (a sign of garage door spring replacement needs).
Why Choose Us?
- We’re Denver locals who’ve mastered commercial overhead door repair and residential fixes.
- Our garage door maintenance plans include weather stripping and garage door gasket installation—because drafts are the worst.
- Transparent pricing (no hidden fees, scout’s honor).
Keep It Smooth: Maintenance Tips to Avoid Future Meltdowns
Want to avoid resetting your opener every other month? A little TLC goes a long way:
- Lubricate the moving parts 2x a year (use silicone spray, not WD-40—trust us).
- Test the door’s balance quarterly. Disconnect the opener and lift it manually. If it doesn’t stay put, call for garage door spring services.
- Replace weather stripping every 2–3 years. Denver’s snow and heat will wreck it faster than you think.
Personal Anecdote Alert: Last winter, a customer called us after their door froze shut. Turns out, their garage door gasket installation was overdue. We fixed it in an hour, and now they’re our biggest fans. Moral? Don’t ignore the small stuff.
FAQs: Your Burning Questions, Answered
- “How much does professional garage door repair cost?”
- Depends on the issue! Simple fixes like remote pairing start around $75. Spring replacements? $150–$350. We’ll always give you a clear price upfront.
- “Can I reset my opener without the Learn button?”
- Older models might require unplugging the unit for 10+ seconds. Still stuck? We’re a quick call away.
- “Why does my door keep reversing?”
- Dirty safety sensors. Wipe them down with a soft cloth—they’re fussy about dirt.
- “Do you handle commercial garage door repair?”
- Absolutely! From warehouses to storefronts, we’ve got Denver covered.
Wrapping Up: You’ve Got This!
Resetting a LiftMaster opener isn’t just about fixing a door—it’s about reclaiming your sanity. Follow our steps, keep up with maintenance, and remember: Clearview Garage Doors is here for the big stuff. Whether you need garage door spring replacement, commercial overhead door repair, or just a friendly chat about insulated garage doors, we’re your Denver neighbors.
Still sweating it? Shoot us a message or call. And hey, next time your door acts up, just smile and whisper, “Not today, Satan.”