How to Install Garage Door Cables (Without Losing a Finger)
Let’s be honest—garage doors are like that one friend who’s mostly reliable… until they’re not. One minute you’re cruising into your driveway, and the next, you’re staring at a lopsided door with cables hanging like spaghetti. Not ideal. But hey, that’s why we’re here! At Clearview Garage Doors in Denver, we’ve seen it all—from DIY disasters to commercial garage door repair miracles. Today, we’re breaking down how to tackle cable installation like a pro. Spoiler: It’s easier than assembling IKEA furniture (most days).
Why Garage Door Cables Deserve Your Attention
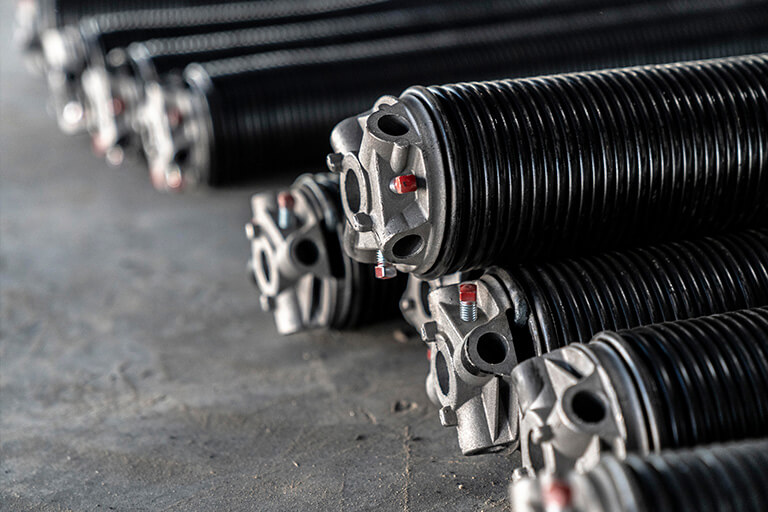
Garage door cables are the unsung heroes of your overhead door system. They work with the springs to lift hundreds of pounds smoothly. Ignore them, and you’ll quickly learn why replacing a shattered window or repairing a dented car bumper isn’t a fun weekend project.
Here’s the deal:
- Snapped cables turn your door into a hazard faster than you can say “Oops.”
- Worn-out cables strain springs, rollers, and your patience.
- Regular maintenance (like checking for fraying) saves you from yelling matches with your garage.
Pro Tip: If your door sounds like a horror movie soundtrack, it’s time to inspect those cables.
Tools You’ll Need (No, Duct Tape Doesn’t Count)
Before we dive in, let’s raid the toolbox. Here’s what you’ll need:
- Locking pliers (to secure the door in place—safety first!).
- Winding bars (for spring tension—don’t use screwdrivers, unless you enjoy ER trips).
- Stepladder (because gravity hates us all).
- New cables (match the old ones’ length and thickness).
- Work gloves (unless you want calluses as souvenirs).
FYI: Clearview Garage Doors stocks heavy-duty cables perfect for Denver’s wild temperature swings—great for insulated garage doors too.
Step-by-Step: Swapping Cables Without the Drama
Step 1: Lock It Down
Park your door halfway open and clamp those locking pliers onto the track below the bottom roller. This keeps the door from crashing down like a bad punchline.
Step 2: Release Spring Tension (Carefully!)
Garage door springs are not a DIY beginner’s project. If you’re dealing with torsion springs (the ones above the door), use winding bars to slowly unwind tension. Seriously, this step can kill you. If you’re sweating bullets, call us—garage door spring replacement is one of our specialties.
Step 3: Remove the Old Cable
Unhook the cable from the bottom bracket and slide it out of the drum. If it’s frayed or rusted, congrats—you’ve found the problem!
Step 4: Thread the New Cable
Feed the new cable through the pulley and into the drum. Wrap it around the drum clockwise (trust us, counterclockwise is a one-way ticket to chaos).
Step 5: Re-Tension the Springs
Rewind the springs with your winding bars, then test the door’s balance. A well-balanced door stays put when lifted halfway. If it doesn’t, adjust the tension.
Personal Anecdote: Last winter, a Denver client tried skipping the locking pliers. Let’s just say their “quick fix” turned into a commercial overhead door repair call. Don’t be that person.
When to Call Clearview Garage Doors
Look, we love a good DIY challenge. But some jobs scream “call a pro,” like:
- Garage door spring repair/replacement (unless you’re training for the circus).
- Commercial garage door repair (downtime = lost $$$).
- New garage door installation (insulated doors are heavy).
We’re based in Denver and specialize in everything from weather stripping to emergency garage door spring services. Need help? We’re just a “garage door repair near me” search away.
Keep Your Cables Happy: Maintenance 101
Want to avoid future meltdowns? Try these tips:
- Lubricate cables and rollers annually (use silicone spray, not WD-40).
- Check for wear every 6 months—fraying = bad news.
- Upgrade to insulated garage doors if you’re tired of Denver’s mood swings.
Bonus: Swap out old garage door gaskets and weather stripping to keep drafts and critters out.
Cable Types: Quick Comparison
| Type | Best For | Lifespan | Cost |
|---|---|---|---|
| Steel Cables | Heavy doors, commercial use | 7–10 years | $$ |
| Vinyl-Coated Cables | Residential doors, damp climates | 5–8 years | $ |
| Stainless Steel Cables | Coastal areas, extreme weather | 10–15 years | $$$ |
FAQs: Garage Door Cables Unraveled
1. How much does cable replacement cost?
DIY costs ~$20–$50 for parts. Professional installation (our recommendation for springs) runs $150–$300. Clearview Garage Doors offers upfront pricing—no guesswork.
2. Can I reuse old cables?
Only if you enjoy living dangerously. Replace them.
3. How often should cables be replaced?
Every 5–10 years, depending on use. Commercial doors need more frequent checkups.
4. Why is my door still uneven after replacing cables?
Likely a spring tension issue. Let’s fix it before your door goes full Titanic.
Final Thoughts: Don’t Let Your Garage Door Win
Cable replacement isn’t rocket science, but it demands respect. Tackle it with caution, the right tools, and a dash of common sense. And hey—if you’d rather binge Netflix than wrestle springs, Clearview Garage Doors has your back. We handle garage door installation, maintenance, and all the “oh crap” moments in between.
Ready to silence that screeching door? Give us a shout. We’re here to keep Denver’s garage doors smooth, safe, and sane. 🙂